So lately I have been busy sewing like a mad woman!
I have been fighting working to complete my daughter’s Waldorf doll for her first birthday.
Wow… never again.
I recently stabbed myself with a needle and bled all over the stupid thing’s neck. Fortunately the blood came out but I decided to take a little break from the blood, sweat and tears of doll-making and tackled another sewing project.
Back in January, I decided to make a list of 12 Projects For 2012. One of the projects was to sew a Happy Birthday B anner. As I surfed the web, I found a variety of helpful instructions and tutorials. Some of my favourites included:
Happy Birthday Banner Tutorial
Another Birthday Banner Tutorial
Being that I’m less than three weeks away from my daughter’s first birthday, I came up with a few shortcuts to simplify the process of making the happy birthday banner.
Here are some great tips to sew a happy birthday banner! #sewing Click To TweetHere are some tips:
- Choose your fabrics wisely. I looked at hundreds of pictures of banners and the best banners were the ones that had simple patterns that matched well with one another. If the fabric is too busy, it makes it hard to “read” the sign.
- My best tip… fold the fabric(s) so that the good sides face each other. Trace the triangles onto the fabric. Place a couple pins to hold the fabric together. Sew along your traced lines (long edges only), THEN cut out the triangles. This process is faster AND you can cut nice and close to the thread for a beautiful, flawless, seam.
- After turning the fabric right-side out, do a top-stich approximately 1 cm away from the edge of the fabric. This gives the banner a clean, finished look.
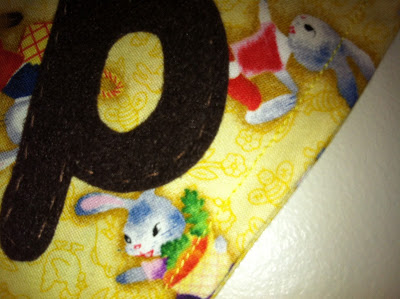
- You can use any font you want for the letters. I typed “happy birthday” into Word, selected my font (Elementary Heavy SF) and enlarged the letters to 250. I printed them out on cardstock, cut them out and then traced them onto brown felt.
- DO NOT use sticky-back felt for the letters. I thought I was being very clever to not “fuss” with pins but when I put them through the sewing machine, my needle kept on getting stuck. I ended up having to handstitch ALL the letters. Yuck!
- If you are machine-sewing the letters, have the needle thread match the letters and choose a bobbin thread that will match the backing fabric. This looks much cleaner. I unfortunately couldn’t do this because of the sticky-back felt issue, but I would definitely take the time to swap out the bobbin thread to match the fabric of the flags.
- When sewing the flags to the bias tape, measure the tape to ensure all the flags will fit. Then, instead of pinning all the flags and sewing, pin only two flags at a time. I hate fussing with with oodles of needles while sewing. I found this method was just as effective and you don’t have to juggle 2.75 m of needles!
So there you have it. A few hours of work and now I have a Happy Birthday banner that can be used for decades of birthdays.


Awesome. I want to buy one :)
Hmmmmm… (rubs chin and contemplates the possibilities).
This has been on my to do list too! Thanks for the inspiration, I’m meaning to create one for our summer birthdays. Since our first birthday is this Saturday, perhaps I’ll try for our littlest one’s in August instead (ha!).
It only took me about five hours to make mine. You’ll have to take pictures and share when you’re done making yours!